Table of Contents
What is PowerDNS and DNS as a critical service
PowerDNS is a DNS server, an especially critical service in any infrastructure that we want to deploy, since this is the main connection between services and operators.
If of all the options we find when we look for a DNS server (we can see a long list at https://en.wikipedia.org/wiki/Comparison_of_DNS_server_software) we look for the following three conditions: can be easily managed, simple deployment and OpenSource. We are going to stay in only one option: PowerDNS and for its management PowerDNS-admin.
PowerDNS (whose development can be seen at https://github.com/PowerDNS/pdns and has more than 1800 stars) is a powerful DNS server whose most interesting features for management are a web service with a powerful API and be able to store information in databases, such as MySQL.
And we select PowerDNS-Admin for two reasons: It is actively maintained (https://github.com/ngoduykhanh/PowerDNS-Admin, more than 750 stars) and visually it is a more friendly environment by having similar format as RedHat tools are currently using.
Why PowerDNS with PowerDNS-Admin?
Because they make up a powerful package where we have the following advantages:
- Easy to install
- Easy to maintain
- Intuitive interface
- Everything is stored in a database (which facilitates replication, backups, high availability, etc.)
- It does not require special browser settings (such as RedHat IDM that requires installing the server certificate in clients)
- Has authentication against multiple sources (LDAP, AD, SAML, Github, Google, etc.)
- Has domain access permissions
To these advantages we must add the existence of multiple containers images that greatly facilitate how to deploy and update this solution.
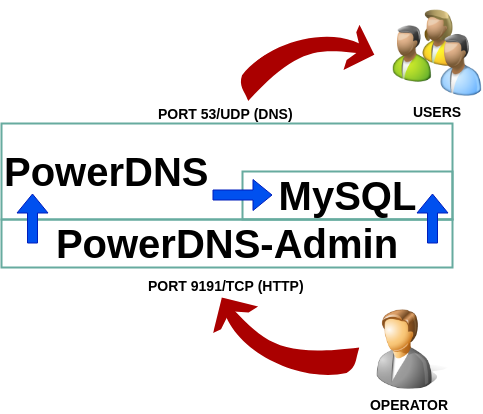
Deploy PowerDNS with Docker-Composer
La solución con PowerDNS consta de tres partes: el servidor dns, para el cual haremos uso de contenedor pschiffe/pdns-mysql:alpine (https://github.com/pschiffe/docker-pdns/tree/master/pdns), el servidor de base de datos mariadb a través del contenedor yobasystems/alpine-mariadb
(https://github.com/yobasystems/alpine-mariadb) y el contenedor aescanero/powerdns-admin que hemos explicado en un post anterior (https://www.disasterproject.com/index.php/2019/08/docker-reducir-tamano/).
The solution with PowerDNS consists of three parts: the dns server, for which we will use the pschiffe/pdns-mysql:alpine (https://github.com/pschiffe/docker-pdns/tree/master/pdns), the mariadb database server through the yobasystems/alpine-mariadb
(https://github.com/yobasystems/alpine-mariadb) and the aescanero/powerdns-admin container that we explained in a previous post (Docker: Reduce the size of a container).
It is important to indicate that the three containers have active maintenance and are small in size, which allows rapid deployment. Ports 53/UDP and 9191/TCP must be available on the machine running the containers.
In order to provide storage space in the database, a volume has been added to the mariadb database, in order to obtain persistence in the configuration of the elements that make up the solution.
$ mkdir ~/mysql
$ git clone https://github.com/aescanero/docker-powerdns-admin-alpine
$ cd docker-powerdns-admin-alpine
$ export LOCALPATH="~/mysql"
$ export DOMAIN="disasterproject.com"
$ export DB_USERNAME="powerdns"
$ export DB_USER_PASSWORD="password"
$ export DB_ROOT_PASSWORD="password"
$ export DB_NAME="powerdns"
$ export PDNS_API_KEY="random"
$ docker-compose up -d
$ docker-compose ps
Once the solution is deployed, we access it at the URL: http: // WHERE_IS_RUNNING_DOCKER: 9191 where the login screen appears in the last section.
To eliminate the deployment made (except the database we have in ~/mysql) we execute:
$ cd ~/docker-powerdns-admin-alpine
$ docker-compose stop
$ docker-compose rm
Deploy PowerDNS with Podman
An even faster option is to deploy the environment with Podman (which we have talked about at Choose between Docker or Podman for test and development environments and that allows us to launch the containers explained in the previous point with the difference that they are executed online and not through a script like the previous case.
Unlike the previous case, it forces us to manage the internal network of containers, in this case we have chosen 10.88.0.254 for the database server, 10.88.0.253 for powerdns-admin and 10.88.0.252, ports 53/UDP and 9191/TCP must be available on the machine that runs the containers.
mkdir ~/mysql
export LOCALPATH=`pwd`"/mysql"
export DOMAIN="disasterproject.com"
export DB_USERNAME="powerdns"
export DB_USER_PASSWORD="password"
export DB_ROOT_PASSWORD="password"
export DB_NAME="powerdns"
export PDNS_API_KEY="random"

sudo podman run -d -v ${LOCALPATH}:/var/lib/mysql \
-e MYSQL_PASSWORD="${DB_USER_PASSWORD}" \
-e MYSQL_DATABASE="${DB_NAME}" \
-e MYSQL_USER="${DB_USERNAME}" \
-e MYSQL_ROOT_PASSWORD="${DB_ROOT_PASSWORD}" \
--ip 10.88.0.254 --name mysql yobasystems/alpine-mariadb

sudo podman run -d \
-e PDNS_api_key="secret" \
-e PDNS_master="yes" \
-e PDNS_api="yes" \
-e PDNS_webserver="yes" \
-e PDNS_webserver_address="0.0.0.0" \
-e PDNS_webserver_allow_from="0.0.0.0/0" \
-e PDNS_webserver_password="secret" \
-e PDNS_version_string="anonymous" \
-e PDNS_default_ttl="1500" \
-e PDNS_soa_minimum_ttl="1200" \
-e PDNS_default_soa_name="ns1.${DOMAIN}" \
-e PDNS_default_soa_mail="hostmaster.${DOMAIN}" \
-e MYSQL_ENV_MYSQL_HOST="10.88.0.254" \
-e MYSQL_ENV_MYSQL_PASSWORD="${DB_USER_PASSWORD}" \
-e MYSQL_ENV_MYSQL_DATABASE="${DB_NAME}" \
-e MYSQL_ENV_MYSQL_USER="${DB_USERNAME}" \
-e MYSQL_ENV_MYSQL_ROOT_PASSWORD="${DB_ROOT_PASSWORD}" \
-p 53:53 --ip 10.88.0.252 --name powerdns pschiffe/pdns-mysql:alpine

sudo podman run -d -e PDNS_PROTO="http" \
-e PDNS_API_KEY="${PDNS_API_KEY}" \
-e PDNS_HOST="10.88.0.252" \
-e PDNS_PORT="8081" \
-e PDNSADMIN_SECRET_KEY="secret" \
-e PDNSADMIN_SQLA_DB_HOST="10.88.0.254" \
-e PDNSADMIN_SQLA_DB_PASSWORD="${DB_USER_PASSWORD}" \
-e PDNSADMIN_SQLA_DB_NAME="${DB_NAME}" \
-e PDNSADMIN_SQLA_DB_USER="${DB_USERNAME}" \
-p 9191:9191 --ip 10.88.0.253 --name powerdns-admin aescanero/powerdns-admin
Once the solution is deployed, we access it at the URL: http://WHERE_IS_RUNNING_PODMAN:9191 where the login screen appears in the last section.
Desplegar PowerDNS en Kubernetes
To deploy this DNS management package in Kubernetes, which will be carried out in future posts where we will use Helm and as in How to launch a Helm Chart without install Tiller we will see that in Helm v3 the use of Tiller is not required.
Accessing PowerDNS-Admin
Once the console is open we access the login, where our first step will be to create an account by entering “Create an account”
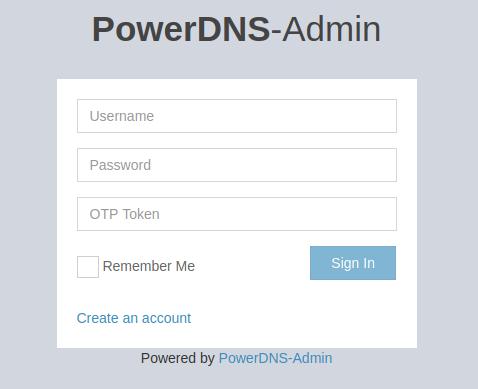
This first user will be a PowerDNS administrator and will be the one who should allow us to create new users, domains and access permissions. We create the user “admin”:
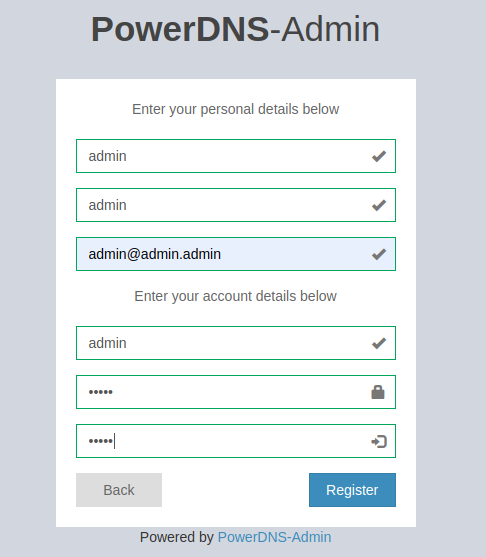
Once the “admin” registry is created, we proceed to log in:
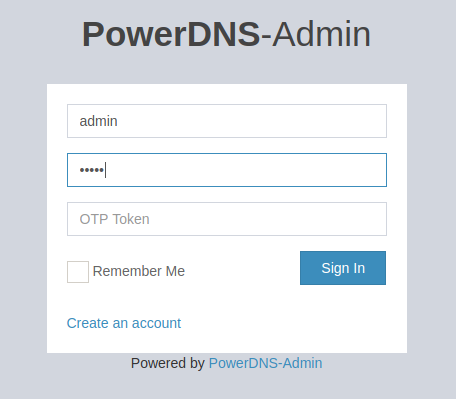
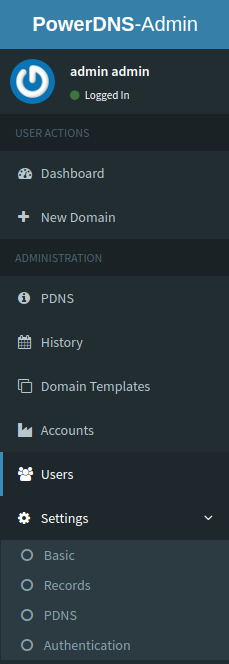
That allows us to access the management console and in the menu on the left we see the configuration part, where we will select “Authentication”:
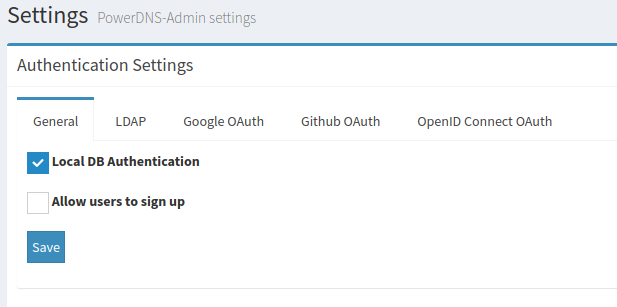
In the configuration parameters, the first thing to remove is “Allow users to sign up” to not allow new registrations from the login area and if it is necessary to configure any external authentication means offered by the platform.
The next step is to go to the “New Domain” section for the creation of new domains and then to the “Users” section where we will create new users.
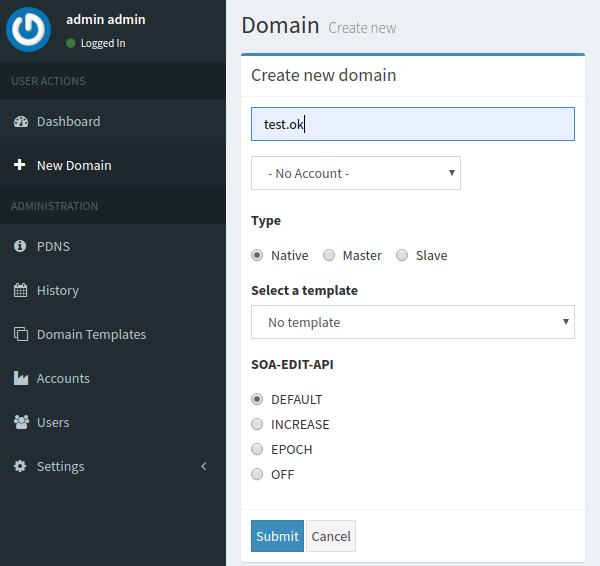
Domain management is really easy and intuitive and user assignment to domains is easily done from the main dashboard screen.